Our
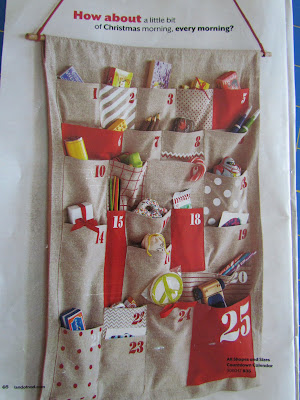
Land of Knod catalog came in the mail this week. I saw
THIS & knew that I wanted to try to make it. I can't wait for Christmas this year as Lily will be able to participate & enjoy it. I've always loved these & this is the year to make one.
First of all I am using ALL existing fabric & scraps. So this is only costing me TIME (which I don't have much of). I started this during Lily's nap on Saturday & finished it after she went to bed. FREE is always a plus around our house.
First I cut out a large rectangular scrap. I finished all edges. First zig-zagging to prevent fraying & then turning it under & using a straight stitch. I also did a 2" rod pocket at the top for the dowel.

Once this was done I had a finished length of 20" x 28"
I added some rick-rack to the top & then started making the pattern for the pockets. I would suggest getting a piece of paper big enough to cover all the pockets. Then cut apart the paper for each pocket. You are making one big puzzle of pockets.

Next, start cutting fabric for each pocket. Remember to leave a half inch around all edges so you can finish the edges.

All 25 pockets cut out & ready to be turned under & finished.

Turn under all edges & sew with a straight stitch. Repeat 25 times.

Once one row of pockets was finished, I pinned them to the back piece.

Lily even helped me select fabric from my scraps.

Once one row is pinned down, top stitch the row of pockets to the back piece. I sewed one row of pockets at a time. Then finished the next 5 pockets, pinned & top stitched.

Repeat this for all 5 rows of pockets.

Now I was ready to number the pockets. I first tried my number stamps with the fabric paint but they were turning out blurry/blotchy. I decided to use my ink pad. This won't be getting washed often so the ink should set & not run.

Number all 25 pockets & your done!

Now its time to start shopping for tiny gifts to go in all 25 pockets!


 Completely worn out.


 First of all I am using ALL existing fabric & scraps. So this is only costing me TIME (which I don't have much of). I started this during Lily's nap on Saturday & finished it after she went to bed. FREE is always a plus around our house.


